Welcome back! If this is your first visit to VeXation you may want to start by reading an introduction to the project or the development environment setup. In this post I’ll share some of my experience starting out on my Windows 95 file infector virus.
Objectives 🔗
The first objective of a file infector virus is to add its own code to another file. In my case the files will be executables. The second objective of a file infector is to make sure the newly added virus code is run in addition to the original executable code. If the virus code isn’t run it can’t propagate to new executables. If the original executable code isn’t run then the virus broke the program it infected and will probably be detected before spreading very far.
To make things manageable I started by focusing on the first objective: adding code to another executable. I prefer to work in small chunks where possible so I chose to break the task up as follows:
- Finding new target executables.
- Deciding if a target is suitable for infection.
- Adding a new section to the target with the correct size and metadata.
- Writing the virus code into the new section of the target.
As I introduce each topic at a high level I’ll share some snippets of my assembly code so far. Towards the end I’ll share the full assembly source code along with some pointers. Lastly I’ll talk about how I validated my work with some handy low level tools.
Generation 0 🔗
Initially it took me some time to wrap my head around “Generation 0” of a virus versus subsequent generations. I’m not certain if anyone else uses this “generation” terminology but it’s what made sense to me.
Typically when you encounter a virus as an end user it’s from running a benign program that was infected by a virus. Have you ever asked yourself how that program was infected? Chances are high that it was infected by another infected benign program. If you imagine tracing these infections backwards eventually there must have been a “Generation 1”, the first benign executable infected by the virus.
How was the generation 1 program infected? The author of the virus must have conspired to do this using what I call “Generation 0” - a program built to bootstrap the infection process. Unlike “Generation n” there is no benign functionality in generation 0, it exists only to infect.
Having some terminology in mind for this was important because I found later on there were practical considerations to be made based on whether the code executing is generation 0 of the virus or a subsequent generation.
Finding target .EXEs 🔗
One of the classic problems of virus development is making sure that your creation doesn’t escape the “lab” or destroy your development system. I imagine this was extra tricky before virtualisation was easy. With the potential for disaster in mind I decided to start by only finding target executables to infect within the same directory as the generation 0 program. It isn’t very difficult to recursively search other directories down the road.
This simple infection strategy makes development easier. For example I wrote my Makefile’s run target to copy a clean calc.exe from C:\WINDOWS into the current directory before running the generation 0 program, overwriting any previously infected versions in the process. I know the infection won’t spread beyond the working directory and so everything is neatly contained.
| |
Finding target files requires using Win32 API functions. I found a copy of win32.hlp for Windows 95 that I use as my primary reference for the available Win32 APIs, their arguments and their return values. Pay particular attention to API function return values! Some API functions (e.g. FindNextFileA) return zero for errors. Other API functions (e.g. FindFirstFileA) return something non-zero (e.g.FindFirstFileA returns 0xFFFFFFFF on error).
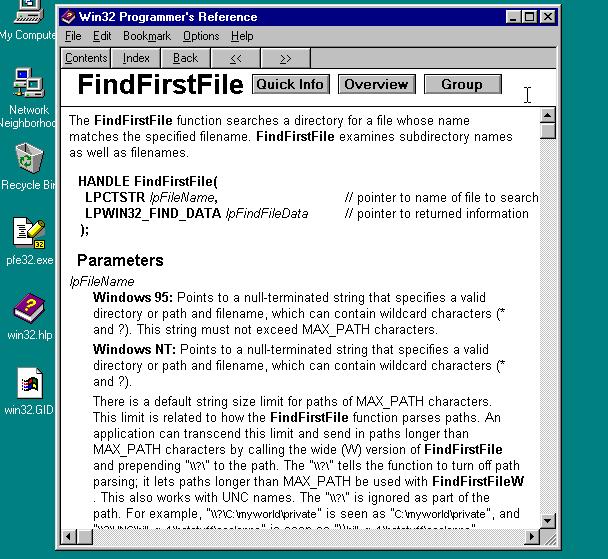
To keep things simple I have been limiting my code to ASCII compatibility which means using the “A” variant of some win32 APIs (for ASCII) vs the “W” variant (for Wide Chars). Remember to drop the “A” suffix when looking up documentation (e.g. search for FindFirstFile in the win32.hlp index not FindFirstFileA). Assembly programmers have to care about “A” vs “W” where normally the Visual C++ runtime hides this distinction from programmers with compile time magic.
To find files in the current directory requires using a combination of FindFirstFileA and FindNextFileA. The first is used to start a directory traversal and the second is used to continue it. By providing a pointer to the null terminated string "*.exe" as the lpFileName I’m able to start a traversal of all executables (if any!) in the current directory.
| |
Deciding if a target is suitable 🔗
This is another classic virus dilemma. Not all target programs are created equal and infecting the wrong program can be disastrous, breaking the target and making the infection inert.
What should be checked? 🔗
A good executable infector needs to check that:
- The target file is a true executable (e.g. not something else renamed to have an
.exeextension). - The target file is a supported executable format (e.g. a PE executable).
- The target file is a “normal” PE executable (e.g. not a DLL).
- The target file’s code is the right architecture (e.g. x86 code).
- The target file is for a supported Windows version (e.g. Win95 not NT).
- The target file has space for the infection, or can support adding space.
- The target file hasn’t already been infected.
There’s a lot to consider! Since I’m targeting Windows 95 I knew the answer to all of the above involved understanding the Portable Executable (PE) format. This is the native executable format for Win95 and supplies ways for a diligent virus writer to check all of these things.
I found there was no better resource for understanding PE’s than Matt Pietrek’s classic from 1994: “Peering Inside the PE: A Tour of the Win32 Portable Executable File Format”. It’s a lot to take in at once but I hope calling out the most important parts as I go along will make it a bit more accessible. If you’ve been around the block with modern Windows much of this will be familiar because Windows still uses PE executables!
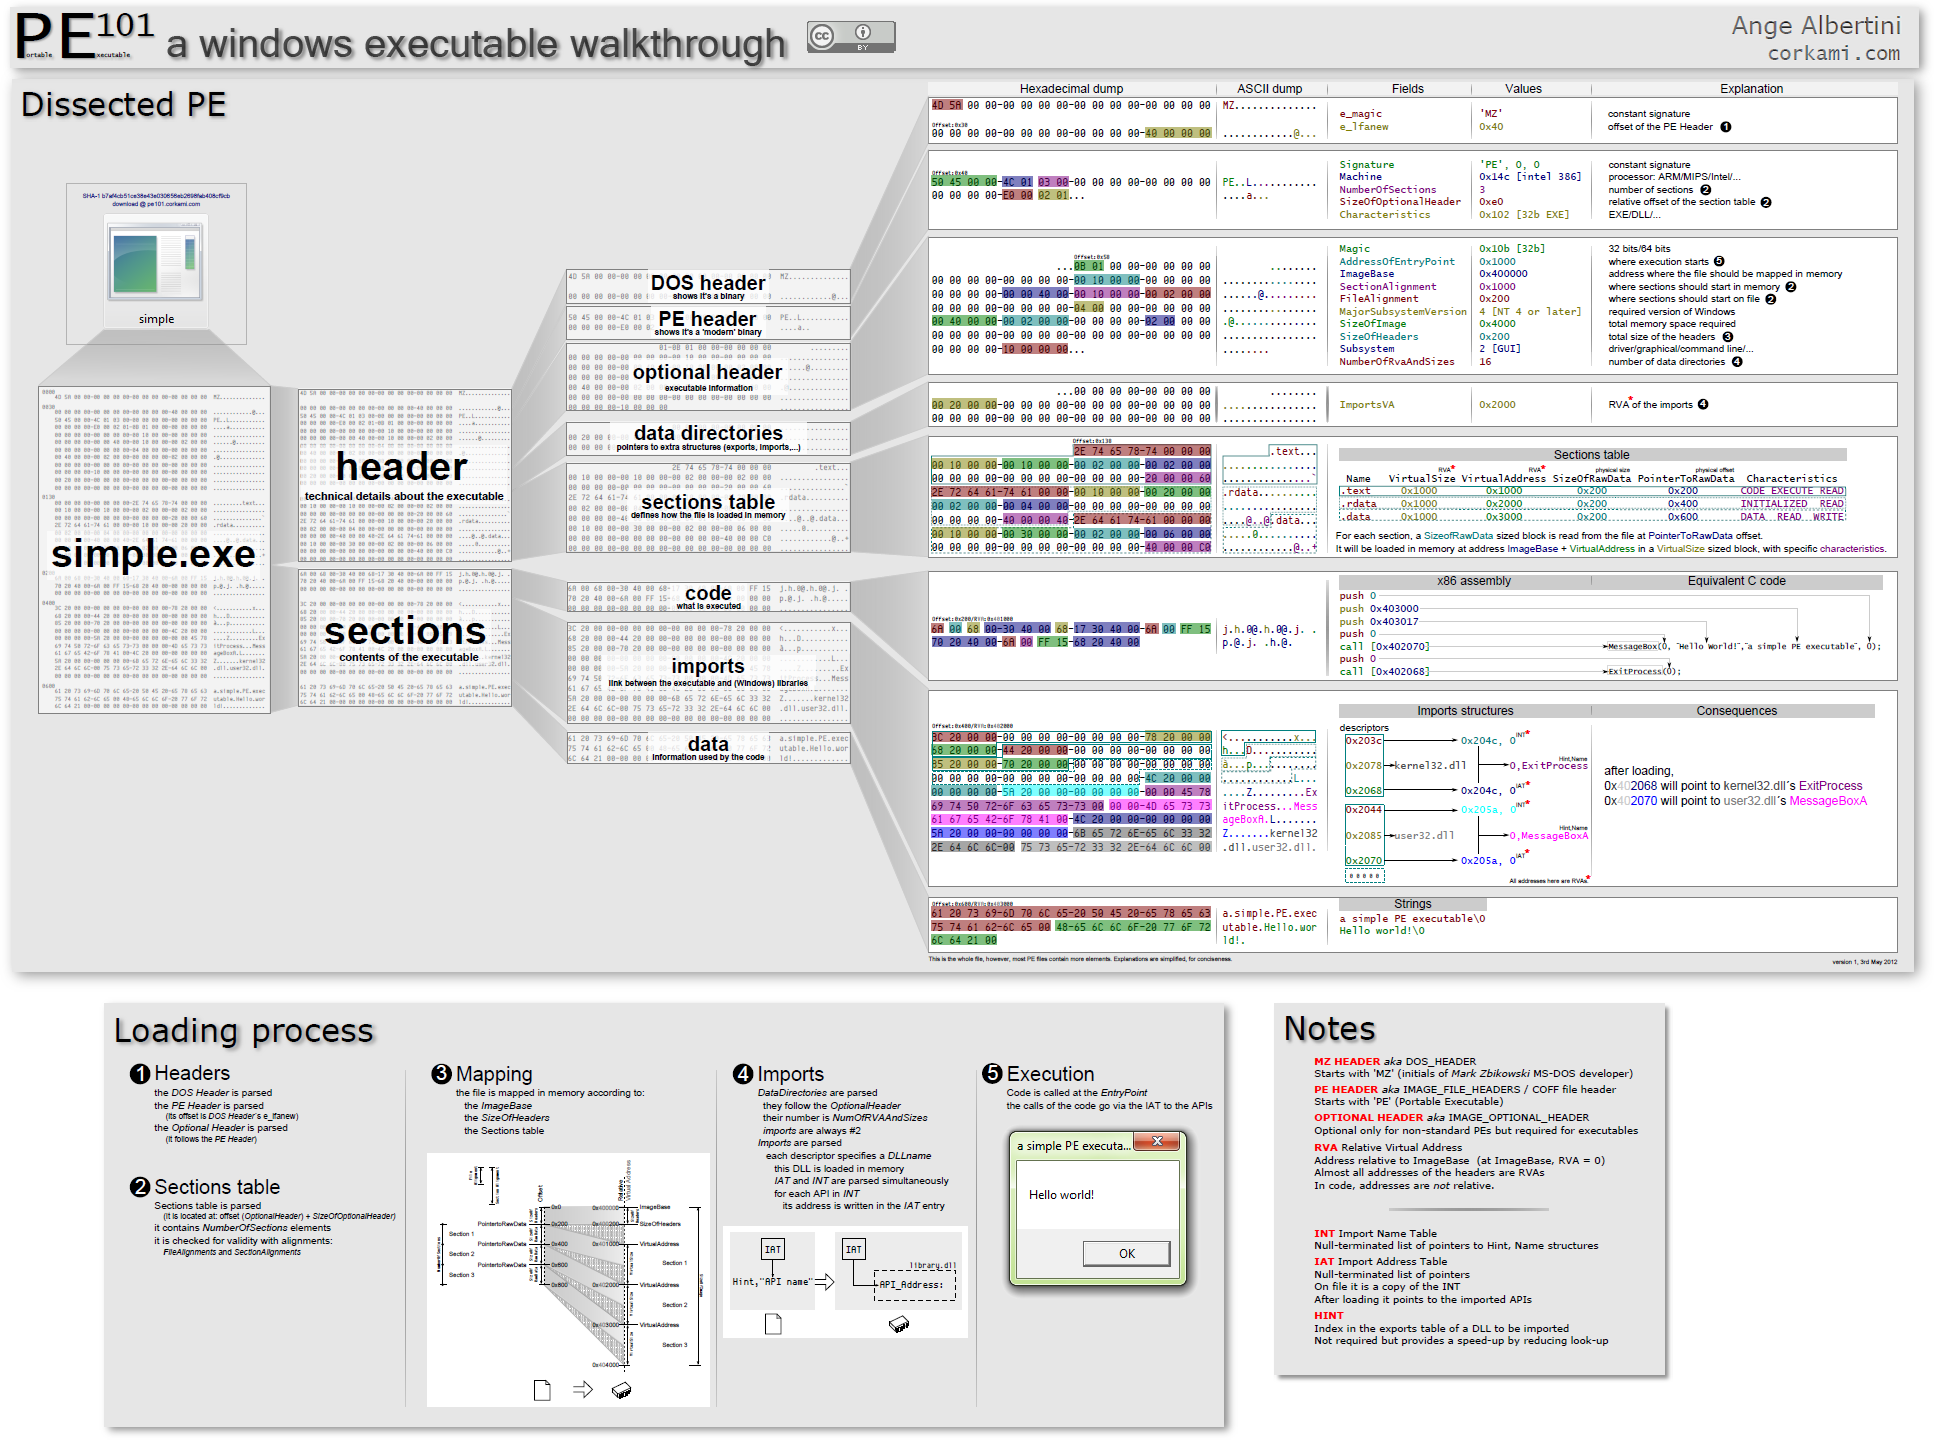
If you’re more visually minded then Ange Albertini’s excellent PE 101 Illustrated is another great companion resource to have handy.
Checking a target executable file 🔗
At a high level checking a target file is pretty straight forward. I needed to:
- open the file for reading.
- check the overall file size.
- memory map the file.
- carefully check offsets within the memory mapped contents.
To open an existing file I need to use the counter-intuitively named CreateFileA function from the Win32 API. This returns a handle pointer for the file that can be used for further operations. The handle doesn’t allow reading from the file by itself but can be used with API calls that can.
To get the file size I used the handle from CreateFileA with the GetFileSize function. Windows supports file sizes from 0 to 264 bytes so the return value from GetFileSize is split into a lower order DWORD (four bytes) returned in the eax register (the win32 api uses the “stdcall” calling convention) and a higher order DWORD (stored using the pointer provided as input to GetFileSize). Since I’m only concerned with verifying a target file is at least big enough to hold the expected PE header structures I can ignore the pointer to the higher order DWORD and just examine the lower order DWORD returned directly from GetFileSize.
There are two paths forward to read and write data from the file handle. Either using SetFilePointer and ReadFile/WriteFile or using memory mapping. I chose to use memory mapping because it involved making less API calls and seemed slightly more straight forward.
Memory mapping requires calling CreateFileMappingA using the file handle from CreateFileA to get yet another handle, this time to a file mapping object. I was able to use the file mapping object handle with MapViewOfFile to map a specified portion of the underlying file into memory. The return value from this function is a pointer to the region of memory the file was mapped and it’s possible to read and write from this region to access and change the file’s contents.
| |
Offsets to check 🔗
With the file memory mapped it’s possible to check whether it can be infected by examining key offsets within the DOS and PE headers. Initially when I was looking at example PE infector source code from this era I found most were using numeric offsets as magic numbers throughout the code. For example, here’s one snippet I found that copies the file and section alignment from a PE header using numeric offsets:
| |
I’m not sure if this is because programmers were often ripping working assembly from viruses found in the wild missing source level context or if it was just how people did it at the time. Either way I found it made code that was difficult to read.
Life was much easier when I used my assembler’s ability to define structures. TASM/MASM both support the STRUCT keyword for this. If there was a STRUCT for the PE header and its optional header then the section and file alignment fields could be accessed without using numeric offsets like 0x3C and 0x38:
| |
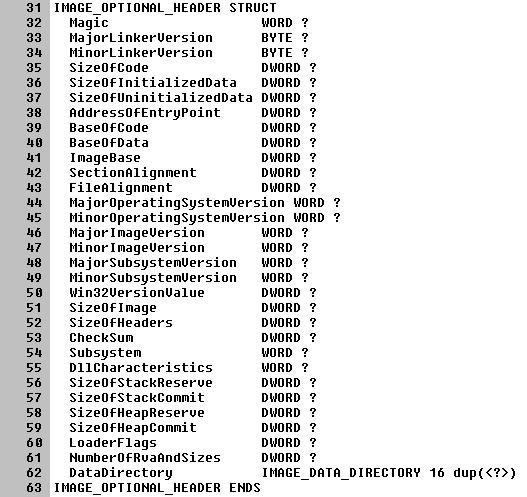
I found that the MASM32 distribution came with a great windows.inc file that contained many predefined structure definitions, including the ones most important for PE manipulation: IMAGE_DOS_HEADER and IMAGE_NT_HEADERS.
One thing I noticed was that the windows.inc field names didn’t always match up to the PE docs exactly (e.g. SecHdrVirtualAddress vs VirtualAddress). The reason for this is because MASM (and TASM in compatibility mode) doesn’t locally scope names within STRUCTs, meaning there can be only one structure field named VirtualAddress across all STRUCTs. If another STRUCT needs a field for a similar purpose it can’t use the same name and has to add a prefix (e.g. Using SecHdr for the section header STRUCT field because Hdr is already in use elsewhere).
For this project I needed to check each target file for following things to decide if it could be infected:
- There should be an
IMAGE_DOS_HEADERDOS MZ header at the very start of the file. - The
e_lfanewpointer from theIMAGE_DOS_HEADERshould point to anIMAGE_NT_HEADERSPE header. - The
IMAGE_NT_HEADERS’OptionalHeader’sSubsystemfield should be the value for the Windows GUI or Windows CUI subsystem (e.g. a graphical or command line Windows program). - The
IMAGE_NT_HEADERS’FileHeader’sMachinefield should be the value for thei386architecture. - There shouldn’t be an
IMAGE_SECTION_HEADERpresent with the same name as the virus code section present (or it’s already infected). - There should be enough space for an additional
IMAGE_SECTION_HEADERto be added.
| |
Adding virus code 🔗
There are lots of ways to add new virus code to an existing PE executable. Three common ways I considered were:
- Adding the virus code in one piece in the unused padding of an existing code section.
- Breaking the virus code into pieces and putting those pieces in unused space found in an existing code section.
- Adding the virus code as a whole new code section.
Option 1 is straight forward but could mean some target files won’t have enough space to be infected. PE code sections are usually aligned on disk by 0x200 bytes (the actual alignment is specified in the PE header), meaning that in the best case if an existing code segment were 0x201 bytes before being aligned with padding the virus could be up to 0x1FF bytes. In the worst case if the existing code segment was exactly 0x200 bytes before alignment then there would be 0 bytes left for an infection! Since I wasn’t sure what an “average” amount of padding was for executables from this era, or how big my virus would eventually be I decided not to pursue this approach to start with.
Option 2 is more complex but can make better use of free space in places other than the section padding. The complexity involved in breaking up the virus code into little segments and connecting them up at run-time was too much to make this a good choice when I was just starting out.
Option 3 is what I settled on. This option gave me freedom to make my virus as big as I wanted and looked like a good place to start. The only space constraint this approach has is making sure that there is enough room in the PE header for one new section metadata entry.
The downsides of this approach relate to anti-virus. Putting it bluntly adding a new section is not subtle. You can identify whether a file is infected or not based on the presence of the new section (in fact that’s how I prevent reinfection). You could even “inoculate” files against infection by adding a benign section with the same name as the virus section. Unlike options 1 and 2, this option also changes the infected file’s size on disk. Lastly, from an AV perspective it’s easy to disinfect infected programs by restoring the original entry point and deleting the malicious segment. Since I was mostly unconcerned with AV these downsides were acceptable.
At a high level adding a new section means:
- Increasing the
NumberOfSectionsWORDin theIMAGE_NT_HEADERS’FileHeader. - Finding the end of the
IMAGE_SECTION_HEADERSarray and adding one more entry. - Calculating the correct
VirtualSize,SecHdrVirtualAddress,SizeOfRawDataandPointerToRawDatafor the newIMAGE_SECTION_HEADER. - Setting the correct
SecHdrCharacteristicflag for the newIMAGE_SECTION_HEADER.
Increasing the NumberOfSections is self explanatory. Finding the end of the IMAGE_SECTION_HEADERS array requires some math. The start of this array is always immediately after the end of the base PE IMAGE_NT_HEADERS structure. I knew where the start of the PE structure is (the e_lfanew pointer from the IMAGE_DOS_HEADER) and I knew the size of the IMAGE_NT_HEADERS structure. That gives me the end of the PE structure and the start of the IMAGE_SECTION_HEADER array. I can calculate the offset to the end of the array by multiplying NumberOfSections by the size of each IMAGE_SECTION_HEADER structure.
| |
Having to calculate two sizes (VirtualSize, and SizeOfRawData) and two offsets (SecHdrVirtualAddress and PointerToRawData) for the section header metadata may seem strange at first. The duplication is more understandable when put in context. PE sections describe something that exists both on disk, and eventually once loaded by the OS, in memory. These two contexts have different requirements. As one example on disk it’s beneficial for code to be aligned to suit the filesystem. In memory it’s beneficial for code to be aligned to suit memory pages. Having one format that can describe both the “virtual” (in memory) and the “physical/raw” (on disk) makes sense and allows for a lot of flexibility.
Calculating the right virtual size and raw data size required knowing the original unaligned size of the virus code. TASM provides a handy tool for this known as the “location counter symbol”.
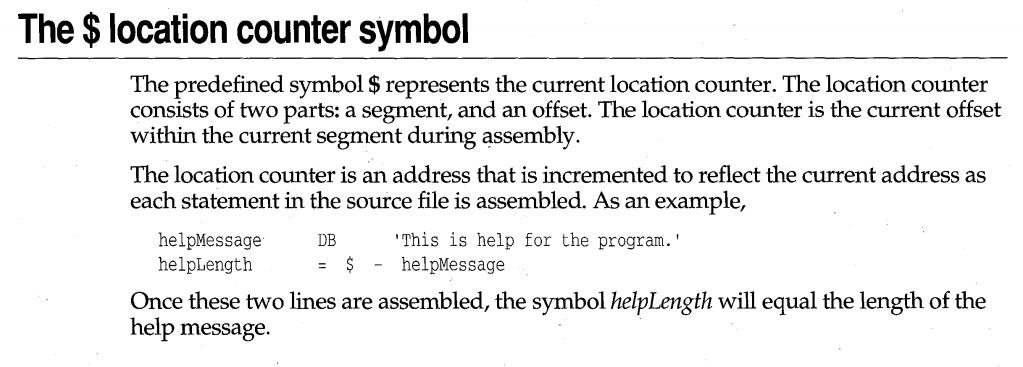
By placing a label (viral_payload) at the very start of the virus code I could use the location counter symbol ($) in an equate that will provide an accurate size constant (viral_payload_size) for the rest of the code to use:
viral_payload_size EQU $ - viral_payload
This equate stayed current as I tweaked the code and avoided having to update a fixed value. The unoptimized assembly linked to later in this post ends up having viral_payload_size EQU 38Eh, a pretty beefy 910 bytes (0x038E == 910).
Aligning the virtual and raw sections according to the required alignment sounds difficult but is just a way of saying that the unaligned size must be made evenly divisible by the alignment value. The calculation is:
(((originalSize - 1) / alignment) + 1) * alignment
A typical value for the PE optional header section alignment is 0x1000, so the adjusted VirtualSize of the new section assuming the viral_payload_size is 0x038E is:
VirtualSize = (((0x038E - 0x1) / 0x1000) + 0x1) * 0x1000
            = 0x1000 = 4096
For the SizeOfRawData a typical file alignment value is 0x0200, so the calculation is:
SizeOfRawData = (((0x038E - 0x1) / 0x0200) + 0x1) * 0x0200
              = 0x0400 = 1024
In both cases you can see the aligned size ends up larger than the original virus size. The extra space in the file and in memory will be empty padding and that’s why file infectors often find the space they need in existing executable segments.
The SecHdrVirtualAddress value is a relative virtual address (RVA) that specifies where the section will start in memory relative to where the loader puts the executable. Many things are specified as RVAs so it’s important to be familiar with this concept. I wanted my new section to start after the end of the existing final section in the target executable which meant the SecHdrVirtualAddress for the new section needed to point at the last section’s SecHdrVirtualAddress plus the last section’s VirtualSize.
Similar to the SecHdrVirtualAddress, the PointerToRawData value is an RVA that specifies where the section will start relative to the beginning of the PE file on disk. The new section should start after the last section on-disk so the PointerToRawData value needed to be the last section’s PointerToRawData plus the last section’s SizeOfRawData.
The last part was setting the SecHdrCharacteristics flag. The new section contains code and should be executable and readable. In the future I know I’ll want the virus code to be able to modify parts of its own section so I also wanted the section to be writable. All told this meant the flag value was the combination of the IMAGE_SCN_MEM_READ, IMAGE_SCN_MEM_WRITE, IMAGE_SCN_MEM_EXECUTE and IMAGE_SCN_CNT_CODE bitmasks.
| |
Writing the virus code into the new section 🔗
The last trick I needed to perform is to expand the target’s overall file size. The new section metadata that gets added is inside of existing slack space between the end of the IMAGE_NT_HEADERS structure and the beginning of the first section and didn’t require changing the file size. The new section content will be added at the end of the file and so I had to enlarge the overall executable to make room after the last section’s contents.
Increasing the file size turns out to be pretty easy and only required remapping the file using CreateFileMappingA and MapViewOfFile again, adjusting the arguments to account for the new space. Because I’m modifying a PE file on disk I need to adjust by the new section’s SizeOfRawData not the original unpadded size or the VirtualSize.
| |
After the enlarged view of the file is mapped it was just a matter of copying the generation 0 code that is currently executing from memory into the new section. For this I used a fun bit of self-referential code that relies on the viral_payload label and the new SizeOfRawData to know where to begin copying from and how many bytes to copy.
| |
Complete Assembly code 🔗
The code that implements all of the above is available in the VeXation Github
repo under the minijector folder. “Mini” because it isn’t a finished virus, “jector” because saying “injector” over and over was driving me batty.
Assuming you have the same dev environment set up as I do you can build the project with make (or with debug symbols using make -DDEBUG). If you want to step through an infection process run make run which will copy a clean calc.exe into the project directory and then run td32 on the minijector.exe binary to let you step through the infection process.
A few high level notes:
- The majority of the good stuff is in minijector.asm.
- I used
.model flat, stdcallat the start so that subsequentcallinstructions for Win32 APIs are handled correctly by default. Win32 uses thestdcallcalling convention and it’s a pain topusharguments onto the stack in reverse order manually. - I didn’t use any of TASM’s “Ideal” mode and the code should be MASM compatible.
- My
windows.incfile is a stripped down version of what comes with the MASM32 SDK. Using the unaltered MASM32windows.incresults in build errors because it’s SO BIG. I cut it down to only whatminijectoruses. - I chose to name the virus segment
ireloc. That’s because most PE binaries already have arelocsection and anidatasection.irelocsounds like it should belong, no? :-) - I tried to write defensive code. Lots of public virus source code skips checking error returns from API calls or assumes the DOS/PE headers aren’t malicious/invalid and I hope paying attention to that stuff makes my extremely simple virus marginally less lame. That said, I’m sure I messed something up and a malicious PE file could be crafted that will crash the infection routines (Send me a sample if you make one!)
- I used a lot of locally scoped (
@@prefixed) labels as something between a comment and a marker post for navigating the sourcecode. This is probably a “quirk” of my own style and not a great practice. - I’m a pretty novice assembly programmer, so (kind) feedback is welcome!
Verifying the work so far 🔗
Whenever computers are involved I find it’s helpful to verify my work in as many ways as possible. Since PE files exist both at-rest on disk and in-memory at-runtime I found it useful to verify both states of an infected calc.exe looked like I expected after running the minijector.exe generation 0 infector in the same directory.
Borland Turbo Assembler 5.0 comes with a handy program called tdump short for (hold your laughter) “Turbo Dump”. This command lets you easily see PE metadata for a given executable. I’ve included the tdump output for a clean calc.exe here, and the tdump of an infected calc.exe here.
There is one important difference in the output that I used to verify the work so far. The original calc.exe has the following sections in the object table:
Object table:
#   Name      VirtSize    RVA     PhysSize  Phys off  Flags
--  --------  --------  --------  --------  --------  --------
01  .text     000096B0  00001000  00009800  00000400  60000020 [CER]
02  .bss      0000094C  0000B000  00000000  00000000  C0000080 [URW]
03  .data     00001700  0000C000  00001800  00009C00  C0000040 [IRW]
04  .idata    00000B64  0000E000  00000C00  0000B400  40000040 [IR]
05  .rsrc     000015CC  0000F000  00001600  0000C000  40000040 [IR]
06  .reloc    00001040  00011000  00001200  0000D600  42000040 [IDR]
The infected calc.exe has one more section (the virus section!) in addition to all of the above:
07 .ireloc 00001000 00013000 00000400 0000E800 E0000020 [CERW]
It was also reassuring at this point to see an RVA value (corresponding to the the SecHdrVirtualAddress field) that was higher than all of the previous section’s RVA values, as well as a Physical Offset (corresponding to the PointerToRawData field) that was higher than all of the previous section’s Physical Offset’s. Also reassuring was seeing the two sizes of the new section both seemed properly aligned and matched my earlier padding calculations.
As mentioned before the new virus section is not subtle and its flags value (corresponding to the SecHdrCharacteristics field) make it even less so. I set the characteristics flag of the section to be read/write as well as executable in preparation for future work and a writable code section will likely tickle some AV heuristics.
To be extra sure things were working as expected I used the values from tdump as a map into a raw hexdump -C of both the clean calc.exe and the infected calc.exe. I cheated here and ran hexdump from my Linux host because I really didn’t want to find a hex dump utility for Windows 95. I included the hexdump output from a clean calc.exe here and from the infected calc.exe here.
Looking at the diff between the two hexdumps showed what I was expecting. Early in the file there was a diff to the number of sections (a 06 changed to a 07). There is also an addition of new section metadata including the .ireloc string bytes (2E 69 72 65 6C 6F 63 00 == ".ireloc\0"). Towards the end of the file was a big blob of new data that isn’t present in the original file (the virus code!).
That confirmed things look good at-rest on disk, but what about at-runtime when the infected calc.exe is loaded into memory? To verify this I turned to the trusty Turbo Assembler debugger td32.
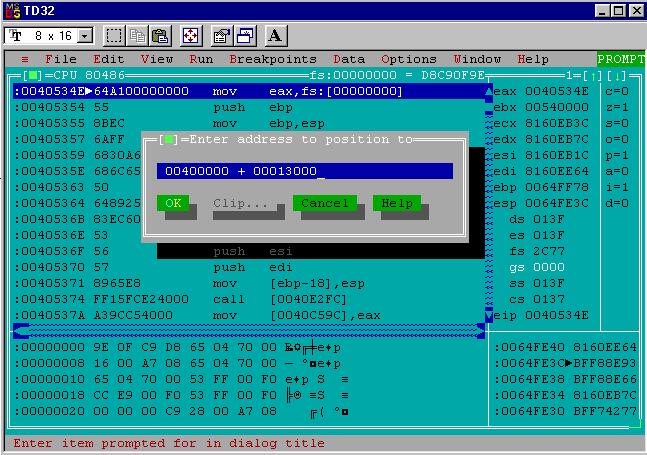
Running the infected calc.exe in td32 initially generated a warning about there being no debug symbols (this is expected). After closing that I found myself at address 0x0040534E. I was able to turn back to the tdump output to understand why that is. The PE was loaded at the base address 0x00400000 and tdump says the entry point RVA is 0x0000534E. Add those two together and you get 0x0040534E, the start address of the original calc.exe code and the location the debugger is paused.
Since I didn’t change the entry point of calc.exe to point to the new segment and the virus code I had to go out of my way to find it in memory to look at the dissassembly. I found the easiest way to do that (while execution is still paused at the start of the calc.exe code) was to:
- right click the viewing area and choose “Go To”.
- enter the expression
00400000 + 00013000
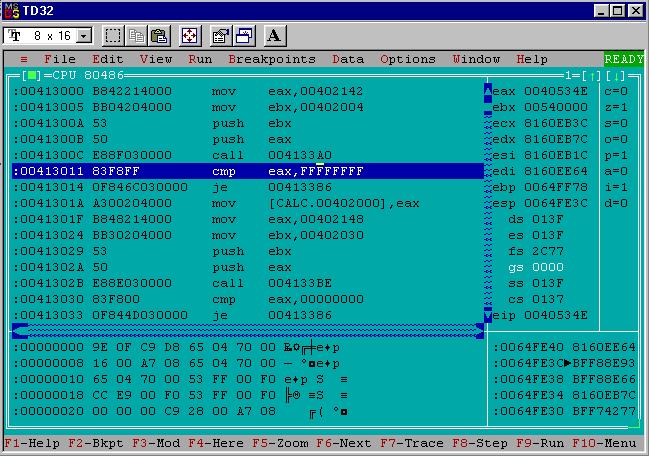
Why is 0x00013000 used in the expression? Back in the tdump output I saw that value is the RVA of the virus segment. Adding it to the base address the infected PE was loaded at (0x00400000) gives the start of the virus code in memory.
Looking at the disassembly that is now in view let me quickly see that the right code was injected. The most obvious “tell” for me is the comparison with 0xFFFFFFFF done a few instructions after the start of the disassembly. That’s
the cmp eax, INVALID_FILE_HANDLE_VALUE instruction from line 61 of minijector.asm. Neat!
The combination of the tdump output, the hexdump -C output, and the state of the program at runtime in td32 all gave me confidence that I’m on the right track.
Conclusion 🔗
Wow, that was a lot of work! Before getting too excited there’s a few hard realities to face. First off, all of the code I injected is entirely inert. Since the entry point RVA wasn’t changed it won’t ever be run. There won’t be a generation 2. Second, and more importantly, even if the code was run it wouldn’t work! There’s three important reasons why:
- It assumes it was loaded in the same location as generation 0/
minijector.exe, not the new segment location incalc.exe! - It references locations that were part of a data segment that wasn’t copied to the infected file!
- It assumes the locations of all of the
kernel32.dllwin32 API addresses that are used won’t change from where they were for generation 0!
Why go through all the trouble of building a file infector that only infects once? Well, you have to start somewhere :-) This was the easiest way I could think to start out and it let me write a more “vanilla” program. The remaining problems help illustrate the unique requirements of virus code compared to normal program code. The solutions are quite interesting and unfortunately will have to wait until next time..
As always, I would love to hear feedback about this project. I’m finding it somewhat challenging to decide on what level of detail to share and what knowledge to assume (e.g. about general assembly programming) so thoughts here are particularly welcome! Feel free to drop me a line on twitter (@cpu) or by email (daniel@binaryparadox.net).
